Now that you could start up a Spring Web Application, where data persistence will play significant role.
Thus, I will present how to integerate JPA(java persitence api) with Spring.
Gradle build file
First of all, you must finish your Gradle build file which is build.gradle.1
2
3
4
5
6
7
8
9
10
11
12
13
14
15
16
17
18
19
20
21
22
23
24
25
26
27
28
29
30
31
32
33
34
35
36
37
38buildscript {
repositories {
mavenCentral()
}
dependencies {
classpath("org.springframework.boot:spring-boot-gradle-plugin:1.3.3.RELEASE")
}
}
apply plugin: 'java'
apply plugin: 'eclipse'
apply plugin: 'idea'
apply plugin: 'spring-boot'
jar {
baseName = 'gs-rest-service'
version = '0.1.0'
}
repositories {
mavenCentral()
}
sourceCompatibility = 1.8
targetCompatibility = 1.8
dependencies {
compile("org.springframework.boot:spring-boot-starter-web")
compile("org.springframework.boot:spring-boot-starter-data-rest")
compile("org.springframework.boot:spring-boot-starter-data-jpa")
compile("mysql:mysql-connector-java:5.1.6")
compile("com.h2database:h2")
testCompile("junit:junit")
}
task wrapper(type: Wrapper) {
gradleVersion = '2.5'
}
In order to access database, which is MySQL that I use, we’d better append mysql connector to this project.
And spring-boot-starter-data-jpa is spring jpa package. The spring-boot-starter-data-rest
would be used later, which would enhance the RESTful data accessing.
Configure JPA
It’s neccessary to connect JPA with database. Of course, JPA would work out even without database. The requirement
of data persistence force us to support with a database. As you know, The MySQL database is my choice. And this setting
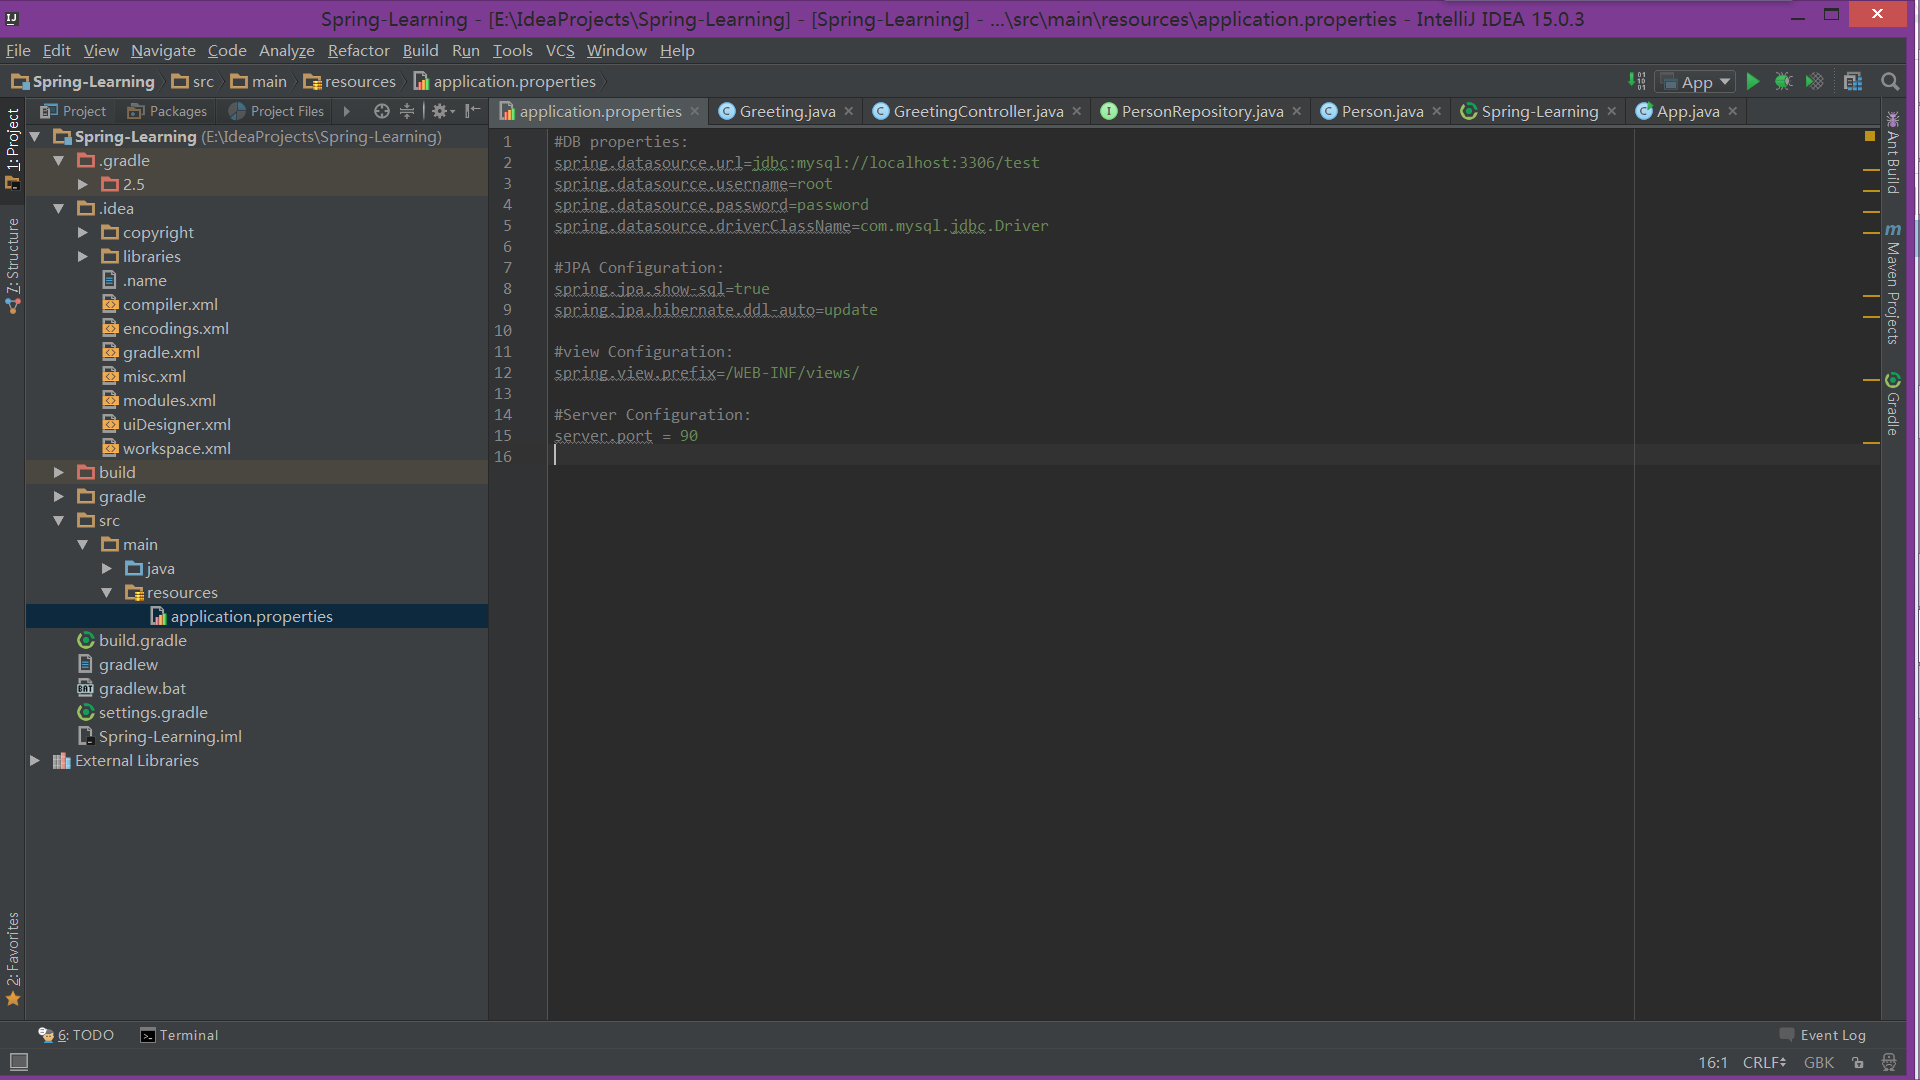
is stored in a file which is application.properties. Now let crate a new file.1
2
3
4└── src
└── main
└── resources
└── application.properties
And input script below.1
2
3
4
5
6
7
8
9
10
11
12
13
14
15#DB properties:
spring.datasource.url=jdbc:mysql://localhost:3306/test
spring.datasource.username=root
spring.datasource.password=password
spring.datasource.driverClassName=com.mysql.jdbc.Driver
#JPA Configuration:
spring.jpa.show-sql=true
spring.jpa.hibernate.ddl-auto=update
#view Configuration:
spring.view.prefix=/WEB-INF/views/
#Server Configuration:
server.port = 90
Make sure you could build this project.
Define a simple entity
In this example, you store Customer objects, annotated as JPA entity.src/main/java/hello/Customer.java1
2
3
4
5
6
7
8
9
10
11
12
13
14
15
16
17
18
19
20
21
22
23
24
25
26
27
28
29
30
31package hello;
import javax.persistence.Entity;
import javax.persistence.GeneratedValue;
import javax.persistence.GenerationType;
import javax.persistence.Id;
@Entity
public class Customer {
@Id
@GeneratedValue(strategy=GenerationType.AUTO)
private long id;
private String firstName;
private String lastName;
protected Customer() {}
public Customer(String firstName, String lastName) {
this.firstName = firstName;
this.lastName = lastName;
}
@Override
public String toString() {
return String.format(
"Customer[id=%d, firstName='%s', lastName='%s']",
id, firstName, lastName);
}
}
Create simple queries
Spring Data JPA focuses on using JPA to store data in a relational database. Its most
compelling feature is the ability to create repository implementations automatically,
at runtime, from a repository interface.src/main/java/hello/CustomerRepository.java1
2
3
4
5
6
7
8
9
10package hello;
import java.util.List;
import org.springframework.data.repository.CrudRepository;
public interface CustomerRepository extends CrudRepository<Customer, Long> {
List<Customer> findByLastName(String lastName);
}
Enhance the Application Class
Now that we have created a App.java, we should append some code.1
2
3
4
5
6
7
8
9
10
11
12
13
14
15
16
17
18
19
20
21
22
23
24
25
26
27
28
29
30
31
32
33
34
35
36
37
38
39
40
41
42
43
44
45
46
47
48
49
50
51
52
53package hello;
import org.slf4j.Logger;
import org.slf4j.LoggerFactory;
import org.springframework.boot.CommandLineRunner;
import org.springframework.boot.SpringApplication;
import org.springframework.boot.autoconfigure.SpringBootApplication;
import org.springframework.context.annotation.Bean;
@SpringBootApplication
public class App {
private static final Logger log = LoggerFactory.getLogger(App.class);
public static void main(String[] args) {
SpringApplication.run(App.class, args);
}
@Bean
public CommandLineRunner demo(CustomerRepository repository) {
return (args) -> {
// save a couple of customers
repository.save(new Customer("Jack", "Bauer"));
repository.save(new Customer("Chloe", "O'Brian"));
repository.save(new Customer("Kim", "Bauer"));
repository.save(new Customer("David", "Palmer"));
repository.save(new Customer("Michelle", "Dessler"));
// fetch all customers
log.info("Customers found with findAll():");
log.info("-------------------------------");
for (Customer customer : repository.findAll()) {
log.info(customer.toString());
}
log.info("");
// fetch an individual customer by ID
Customer customer = repository.findOne(1L);
log.info("Customer found with findOne(1L):");
log.info("--------------------------------");
log.info(customer.toString());
log.info("");
// fetch customers by last name
log.info("Customer found with findByLastName('Bauer'):");
log.info("--------------------------------------------");
for (Customer bauer : repository.findByLastName("Bauer")) {
log.info(bauer.toString());
}
log.info("");
};
}
}
Build and run the project!
Database Result
You should see something like this:1
2
3
4
5
6
7
8
9
10
11
12
13== Customers found with findAll():
Customer[id=1, firstName='Jack', lastName='Bauer']
Customer[id=2, firstName='Chloe', lastName='O'Brian']
Customer[id=3, firstName='Kim', lastName='Bauer']
Customer[id=4, firstName='David', lastName='Palmer']
Customer[id=5, firstName='Michelle', lastName='Dessler']
== Customer found with findOne(1L):
Customer[id=1, firstName='Jack', lastName='Bauer']
== Customer found with findByLastName('Bauer'):
Customer[id=1, firstName='Jack', lastName='Bauer']
Customer[id=3, firstName='Kim', lastName='Bauer']

As you could see, a new table whose name is customer has been created.
And data has been stored successfully.
Refernce
https://spring.io/guides/gs/accessing-data-jpa/