In fact, I found there is no resource to configure development enviornment of spring on IntelliJ.
Thus, I post a blog that would help you initiate a Web Service.
Construct a Gradle Project
Select Gradle on the left column and don’t forget click Java on the right.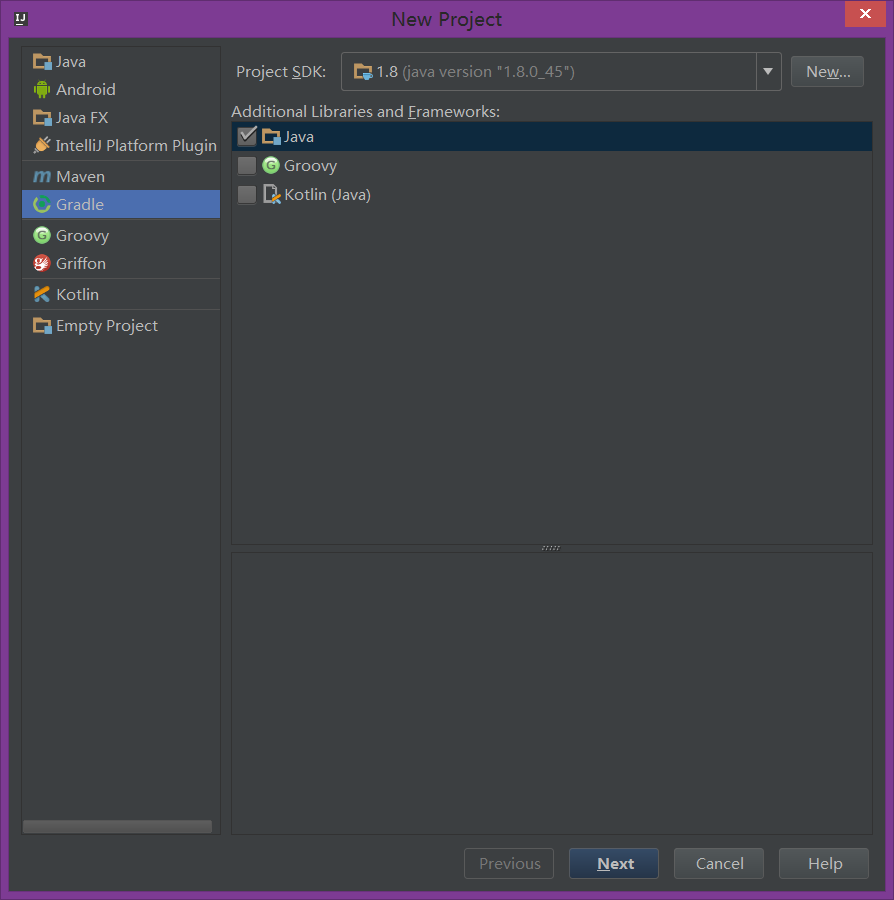
Then Click Next.
Eneter something.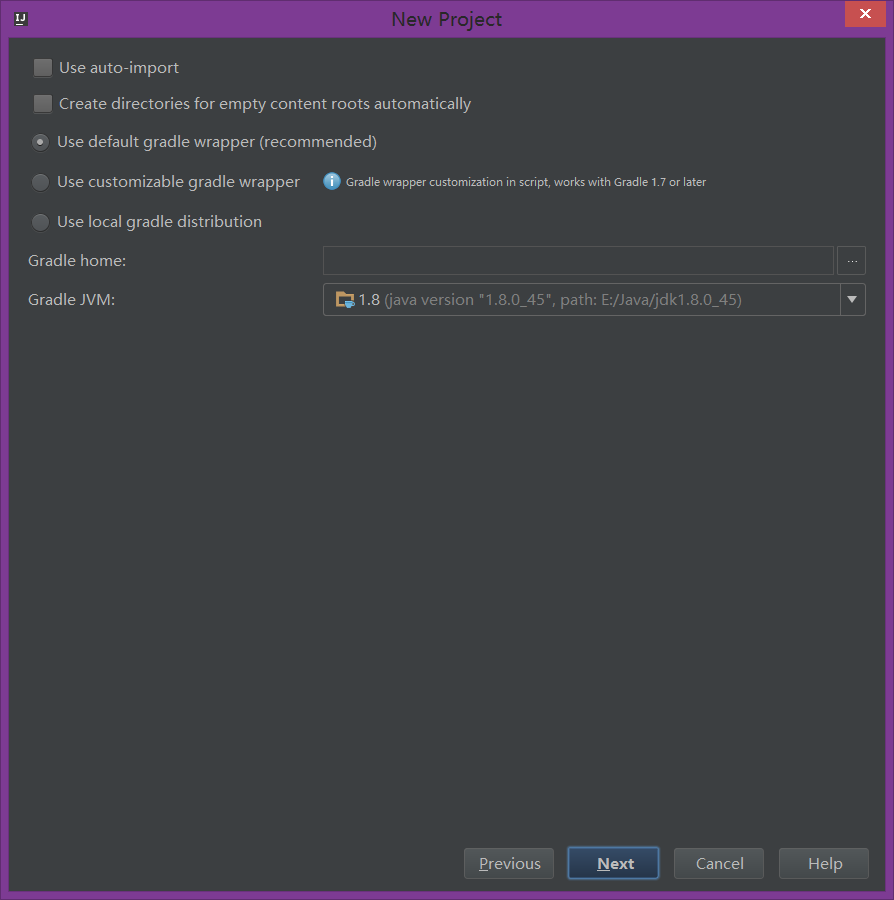
The default gradle wrapper is OK.
Now you could finish the project construction.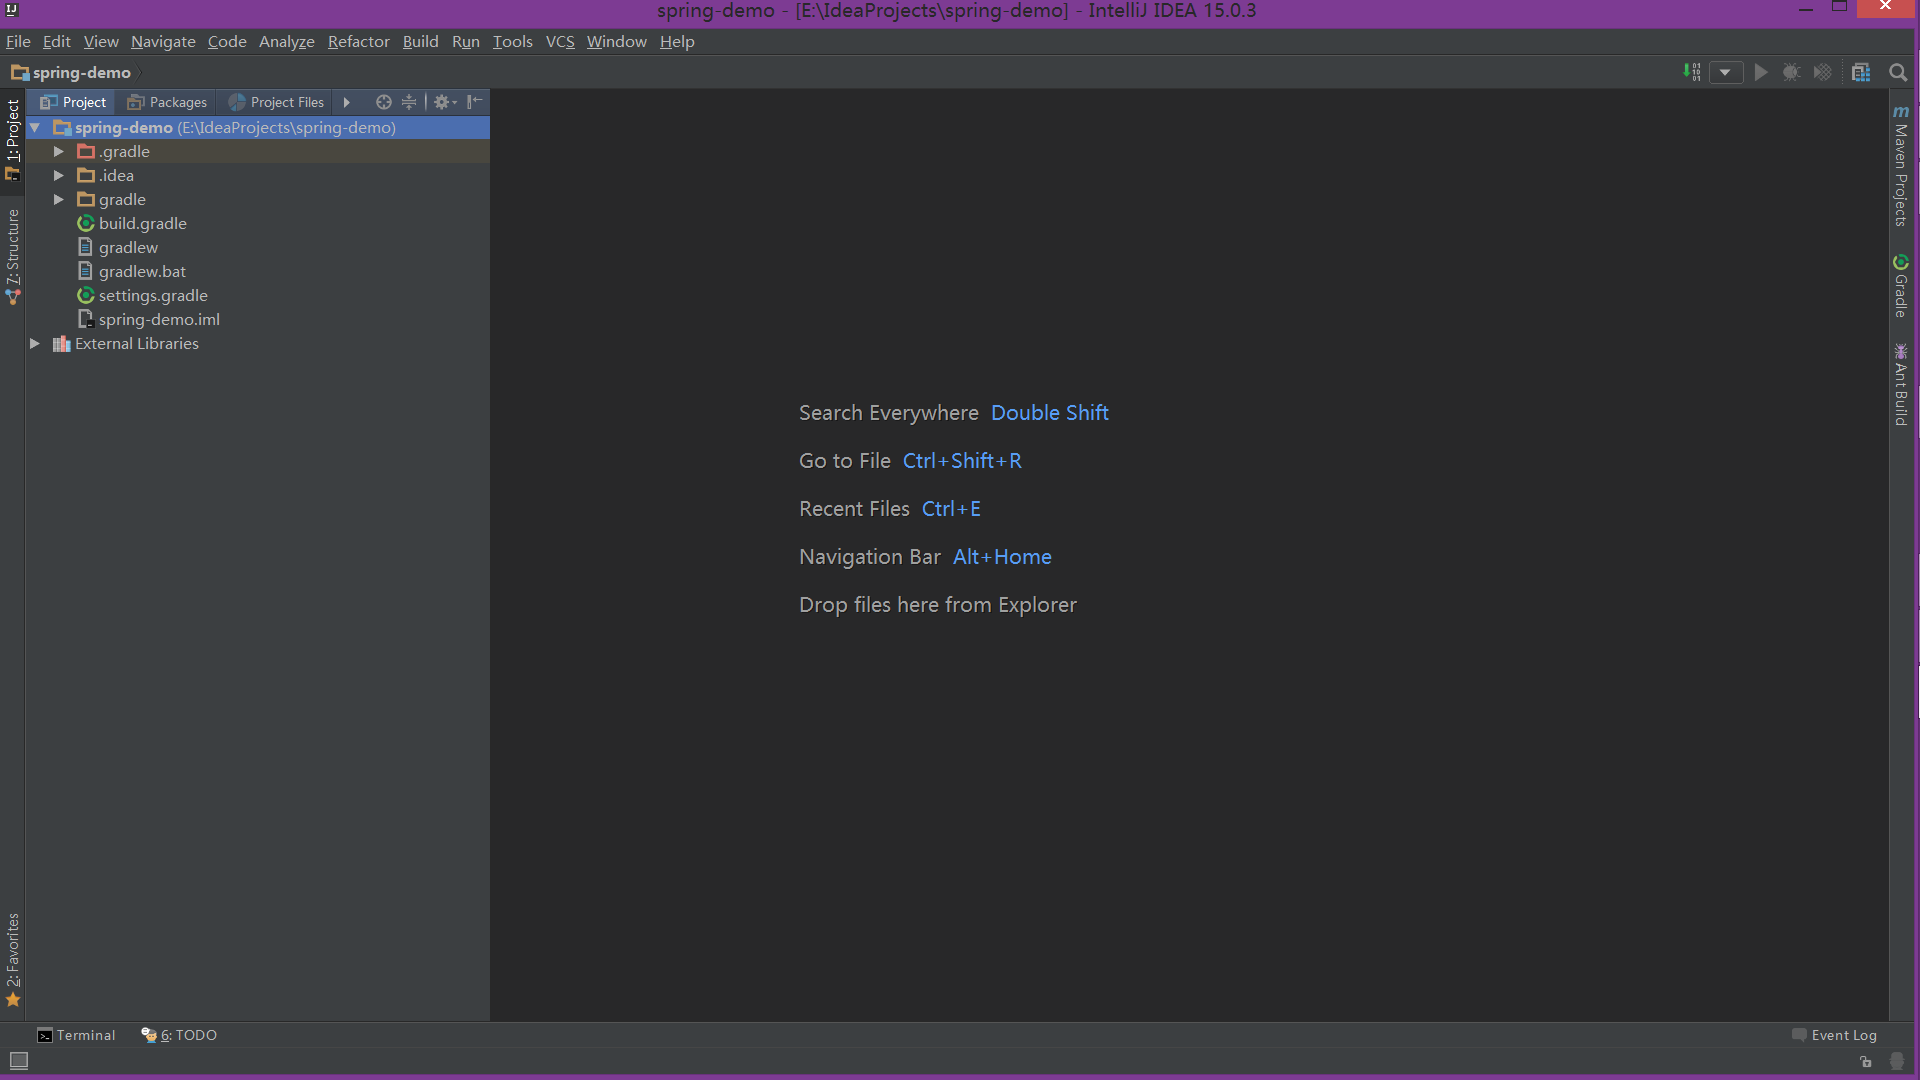
Select Project structure on the left column demonstrating current project structure.
Build with Gradle
Creat the directory structure
Gradle require specified directory structure demonstrated below.1
2
3
4└── src
└── main
└── java
└── hello
Create a Gradle build file
Modify build.gradle with below gradle script.1
2
3
4
5
6
7
8
9
10
11
12
13
14
15
16
17
18
19
20
21
22
23
24
25
26
27
28
29
30
31
32
33
34buildscript {
repositories {
mavenCentral()
}
dependencies {
classpath("org.springframework.boot:spring-boot-gradle-plugin:1.3.3.RELEASE")
}
}
apply plugin: 'java'
apply plugin: 'eclipse'
apply plugin: 'idea'
apply plugin: 'spring-boot'
jar {
baseName = 'gs-rest-service'
version = '0.1.0'
}
repositories {
mavenCentral()
}
sourceCompatibility = 1.8
targetCompatibility = 1.8
dependencies {
compile("org.springframework.boot:spring-boot-starter-web")
testCompile("junit:junit")
}
task wrapper(type: Wrapper) {
gradleVersion = '2.5'
}
And don’t forget change the gradleVersion to your actual gradle version.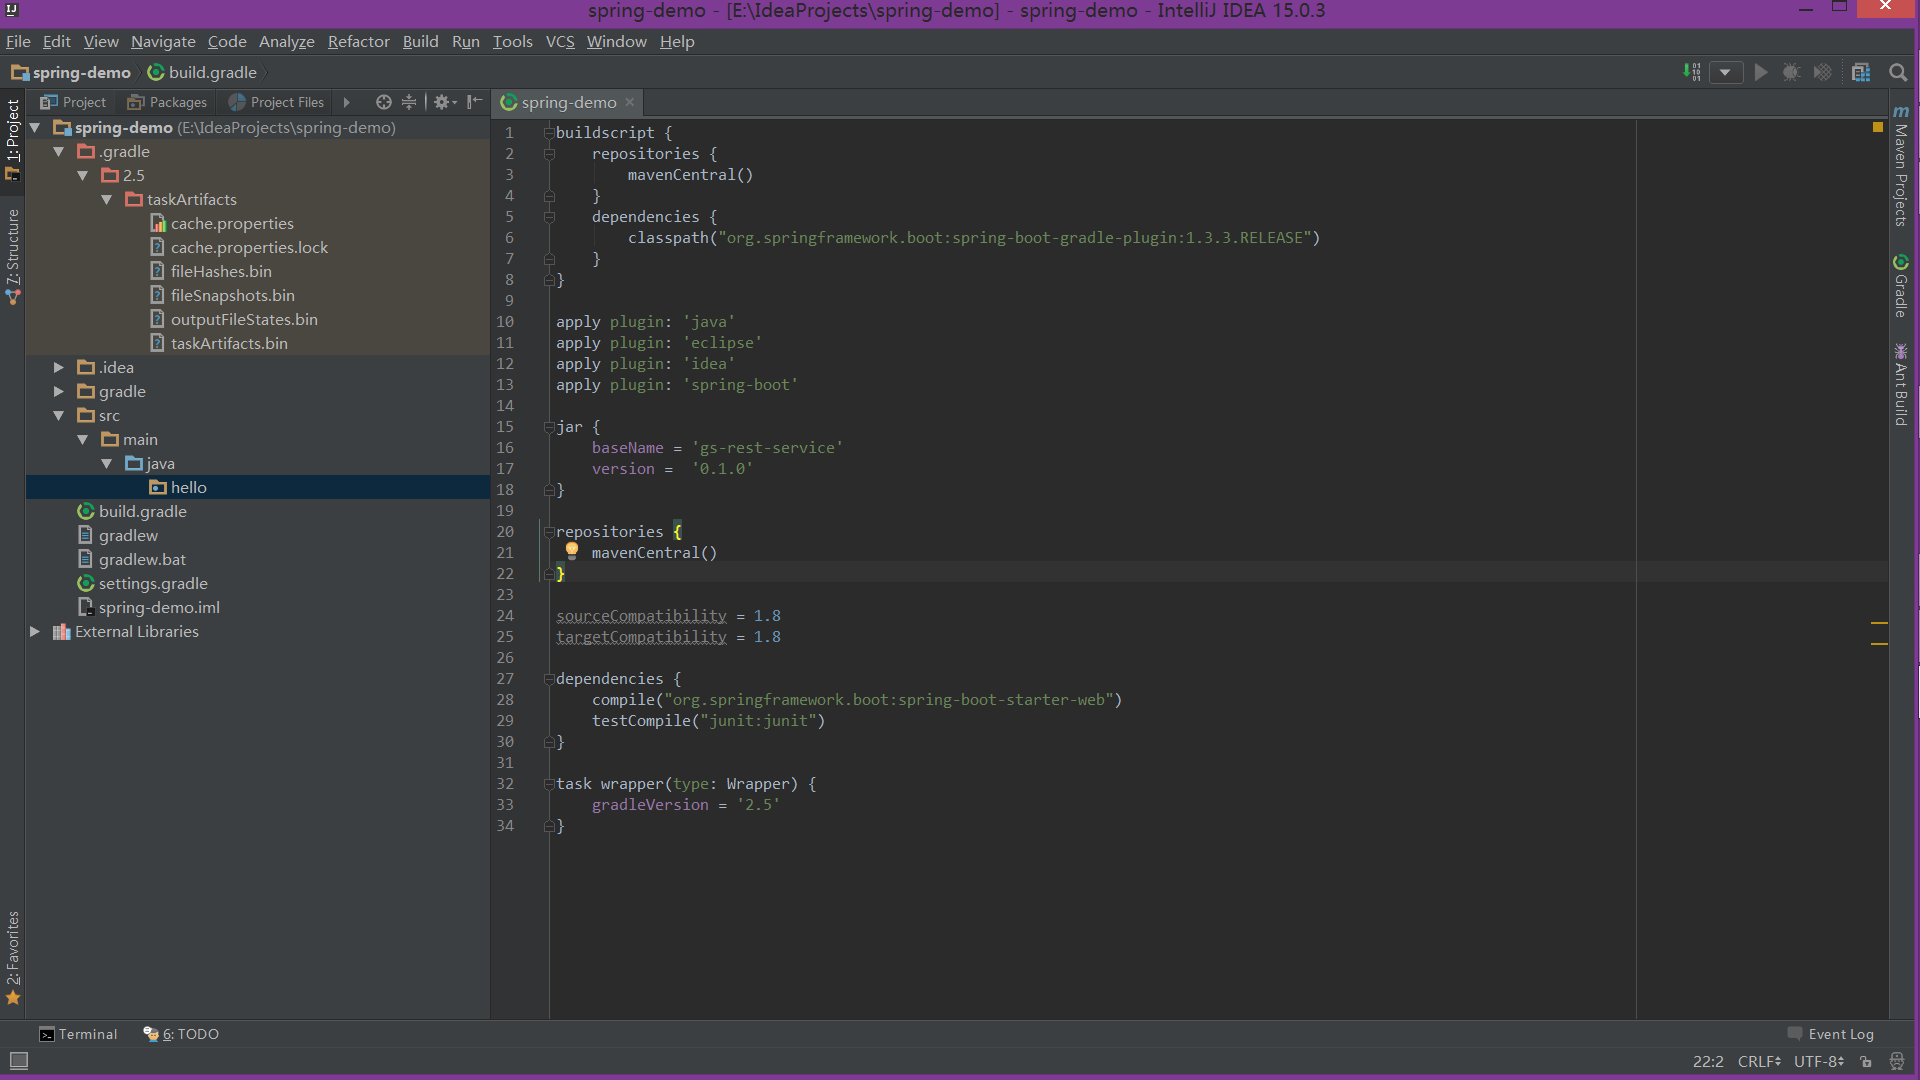
Now, you could click the Gradle button on left side. Open the sidebar and click the Refresh button.
You might have to wait several minutes for building, cause gradle have to download jar-package from network.
Create a resource representation class
Now that you’ve set up the project and build system, you can create your web service.
Begin the process by thingking about service interactions.
The service will handle GET requests for /greeting, optionally with a name parameter in the query string.
The GET request should return a 200 OK response with JSON in the body that represents a greeting. It should
look something like this:1
2
3
4{
"id": 1,
"content": "Hello, World!"
}
The id field is a unique identifier for the greeting, and content is the textual representation of the greeting.
To model the greeting representation, you create a resource representation class. Provide a plain old java object with fields, constructors, and accessors for the id and content data:
Create a new file src/main/java/hello/Greeting.java. And type java code below.1
2
3
4
5
6
7
8
9
10
11
12
13
14
15
16
17
18
19
20package hello;
public class Greeting {
private final long id;
private final String content;
public Greeting(long id, String content) {
this.id = id;
this.content = content;
}
public long getId() {
return id;
}
public String getContent() {
return content;
}
}
Create a resource controller
In Spring’s approach to building RESTful web services, HTTP requests are handled by a controller. These components are
easily identified by the RestControler annotation, and the GreetingControoler below handles GET requests for/greeting by returning a new instance of the Greeting class:src/main/java/hello/GreetingController.java1
2
3
4
5
6
7
8
9
10
11
12
13
14
15
16
17
18
19package hello;
import java.util.concurrent.atomic.AtomicLong;
import org.springframework.web.bind.annotation.RequestMapping;
import org.springframework.web.bind.annotation.RequestParam;
import org.springframework.web.bind.annotation.RestController;
public class GreetingController {
private static final String template = "Hello, %s!";
private final AtomicLong counter = new AtomicLong();
("/greeting")
public Greeting greeting(@RequestParam(value="name", defaultValue="World") String name) {
return new Greeting(counter.incrementAndGet(),
String.format(template, name));
}
}
Make the application executable
Although it is possible to package this service as a traditional WAR file for deployment to an external application server,
the simpler approach demonstrated below creats a standalone application. You package everthing in a single, executable JAR
file, driven by a good old java main() method. Along the way, you use Spring’s support for embedding the Tomcat servlet
container as the HTTP runtime, instead of deploying to am external instance.src/main/java/hello/App.java1
2
3
4
5
6
7
8
9
10
11
12package hello;
import org.springframework.boot.SpringApplication;
import org.springframework.boot.autoconfigure.SpringBootApplication;
public class App {
public static void main(String[] args) {
SpringApplication.run(App.class, args);
}
}
Run/Debug Configuration
Build the Project
Now, it’s time to build and run this project. First of all, click the inverted triangle button on the right of the top bar and select theEdit Configuration.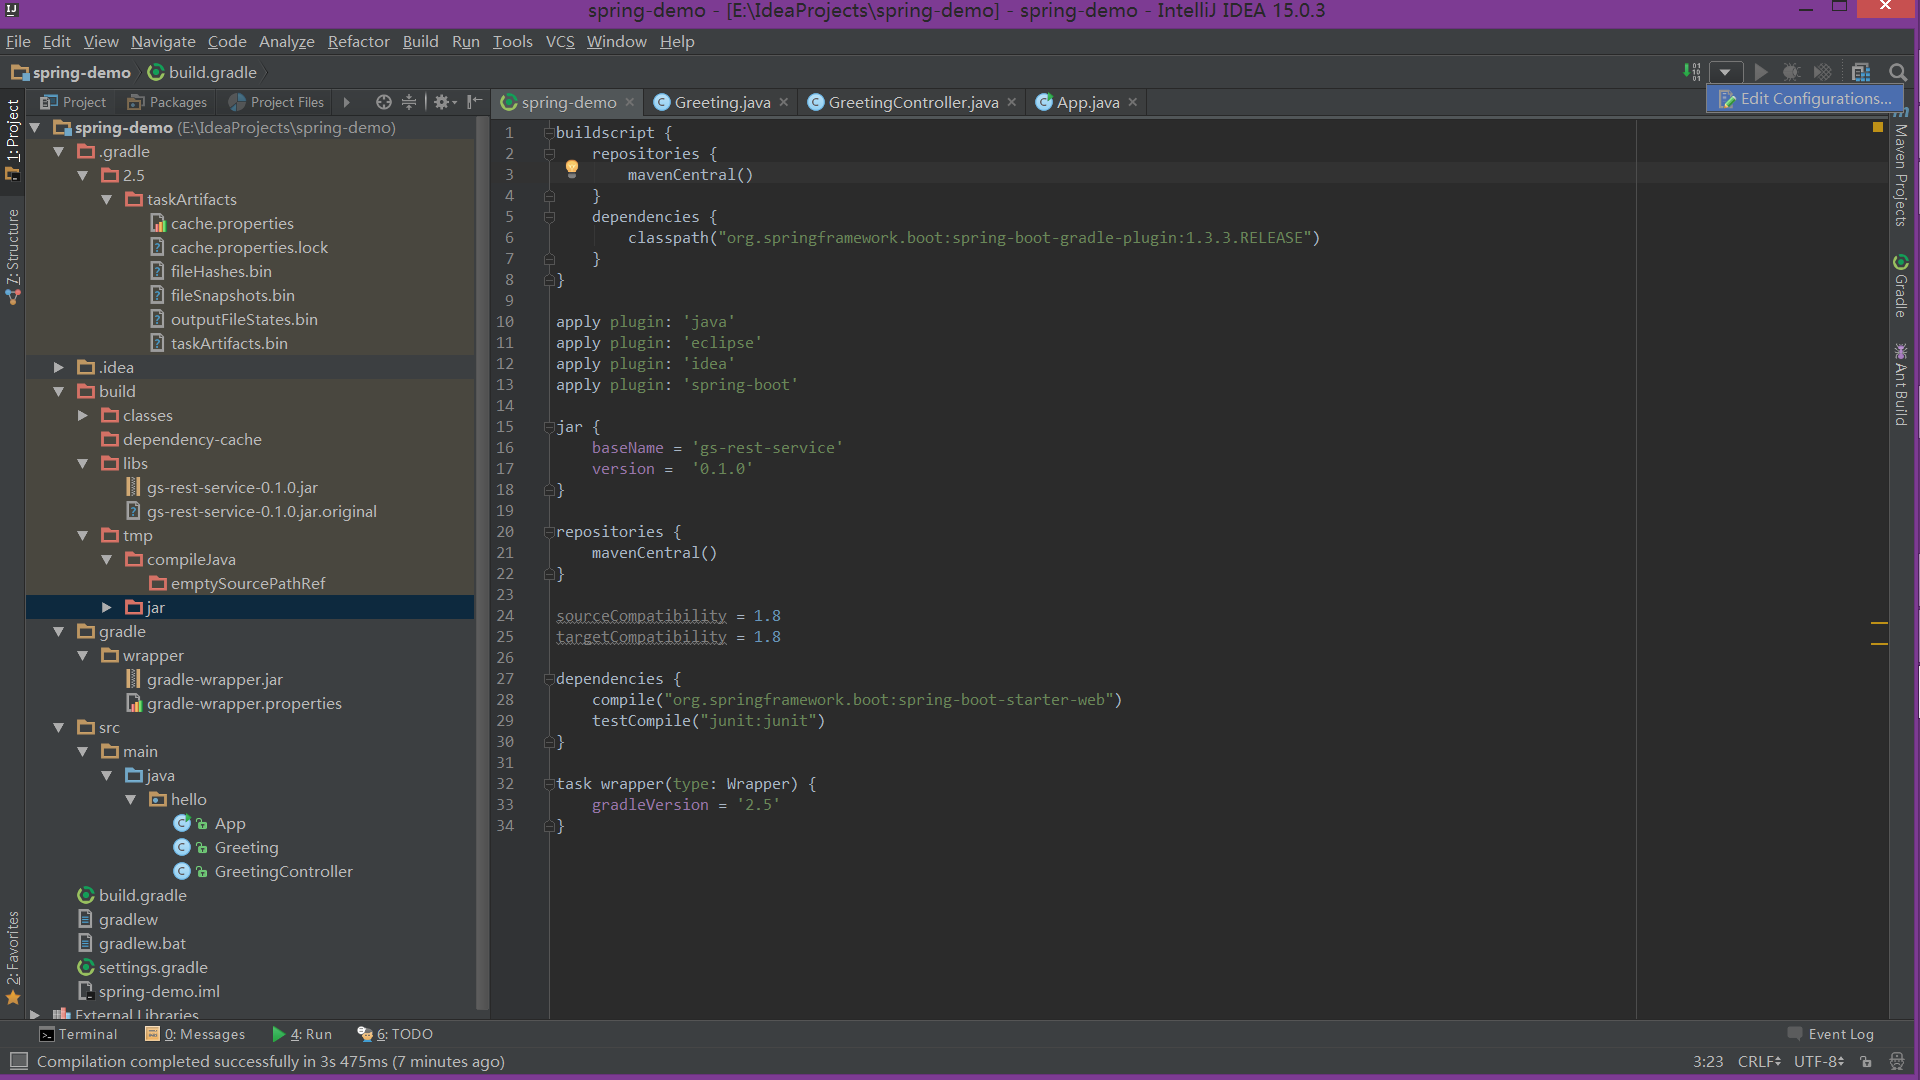
And then, click plus sign and select Gradle.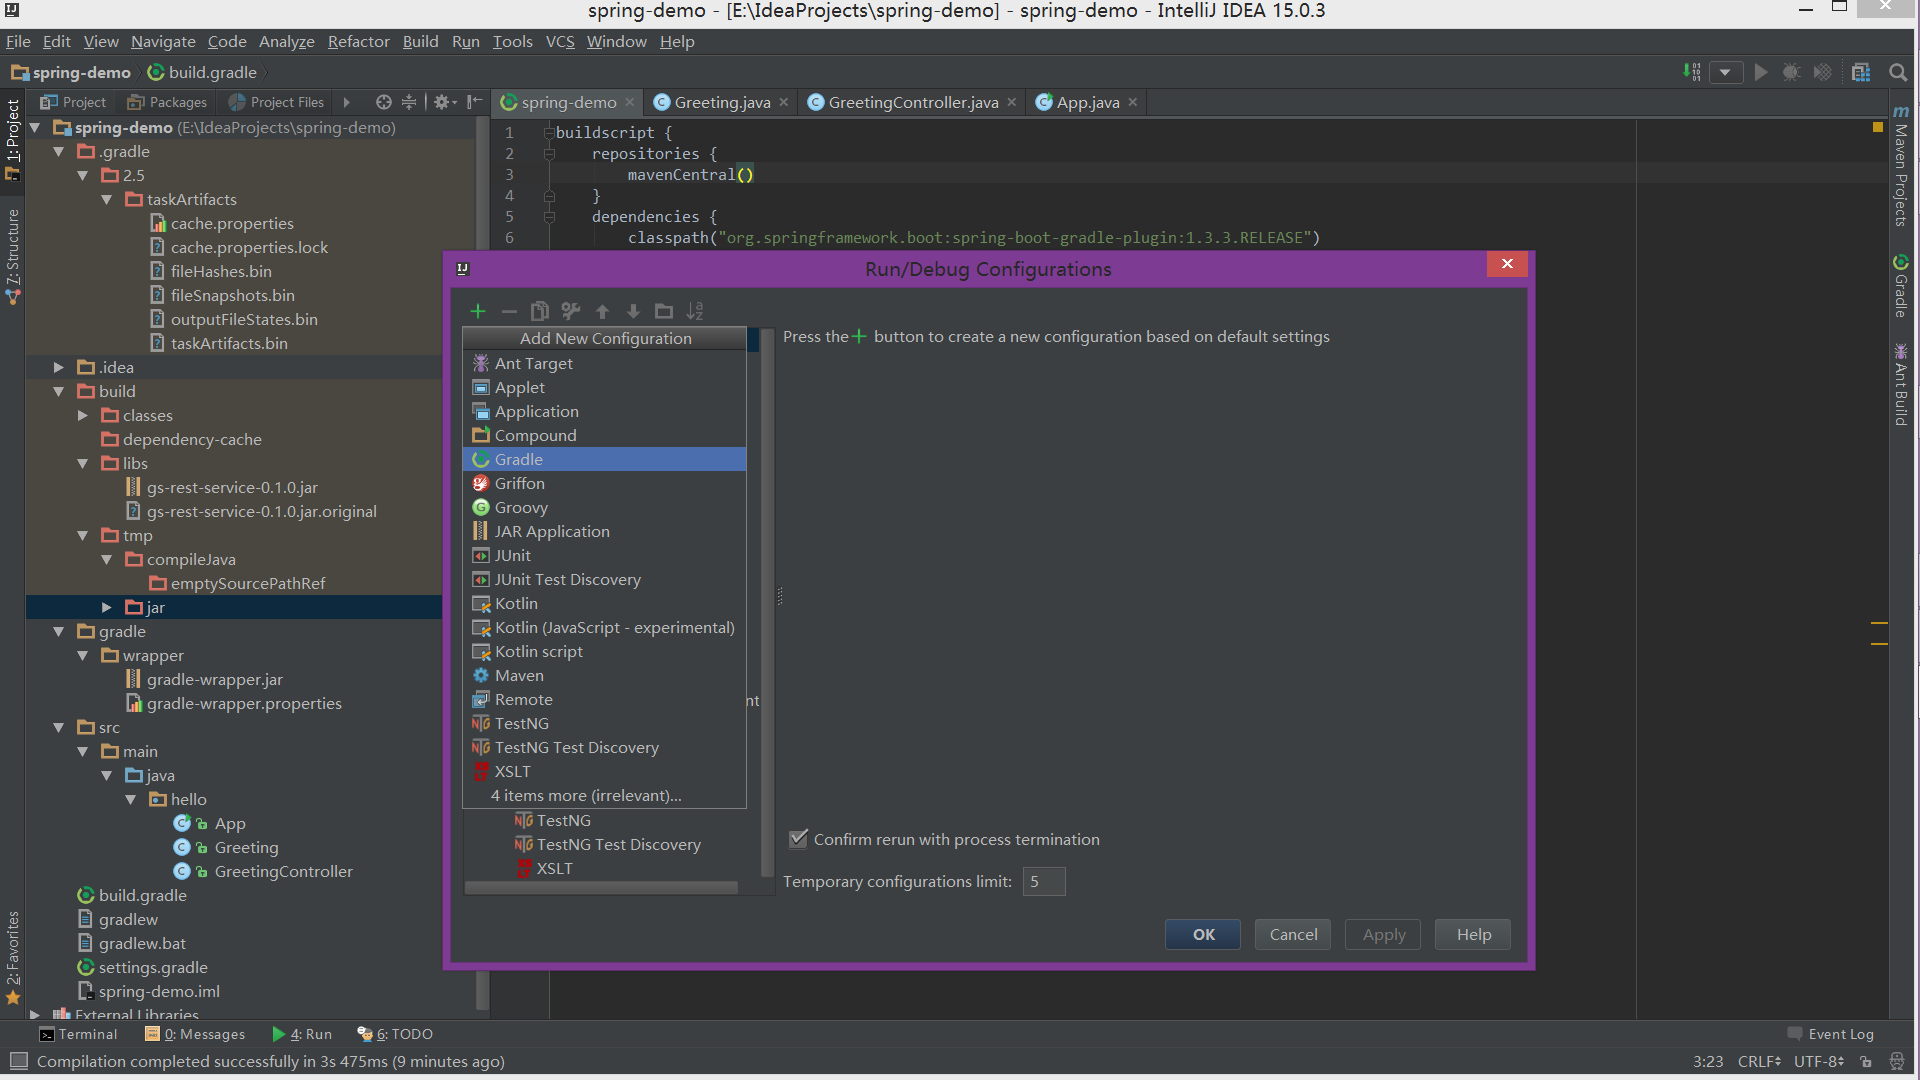
Input build or whatever you like as its name. And select your gradle project and you must specify the tasks that is build.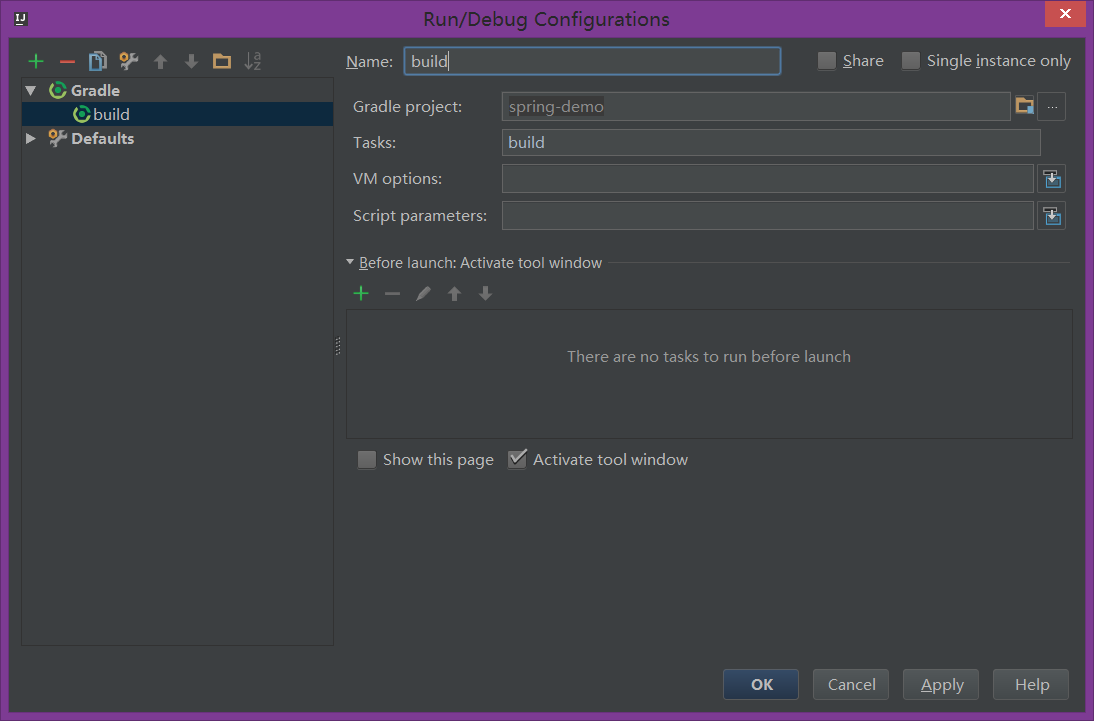
Click the triangle button, and you could see that the project build successfully.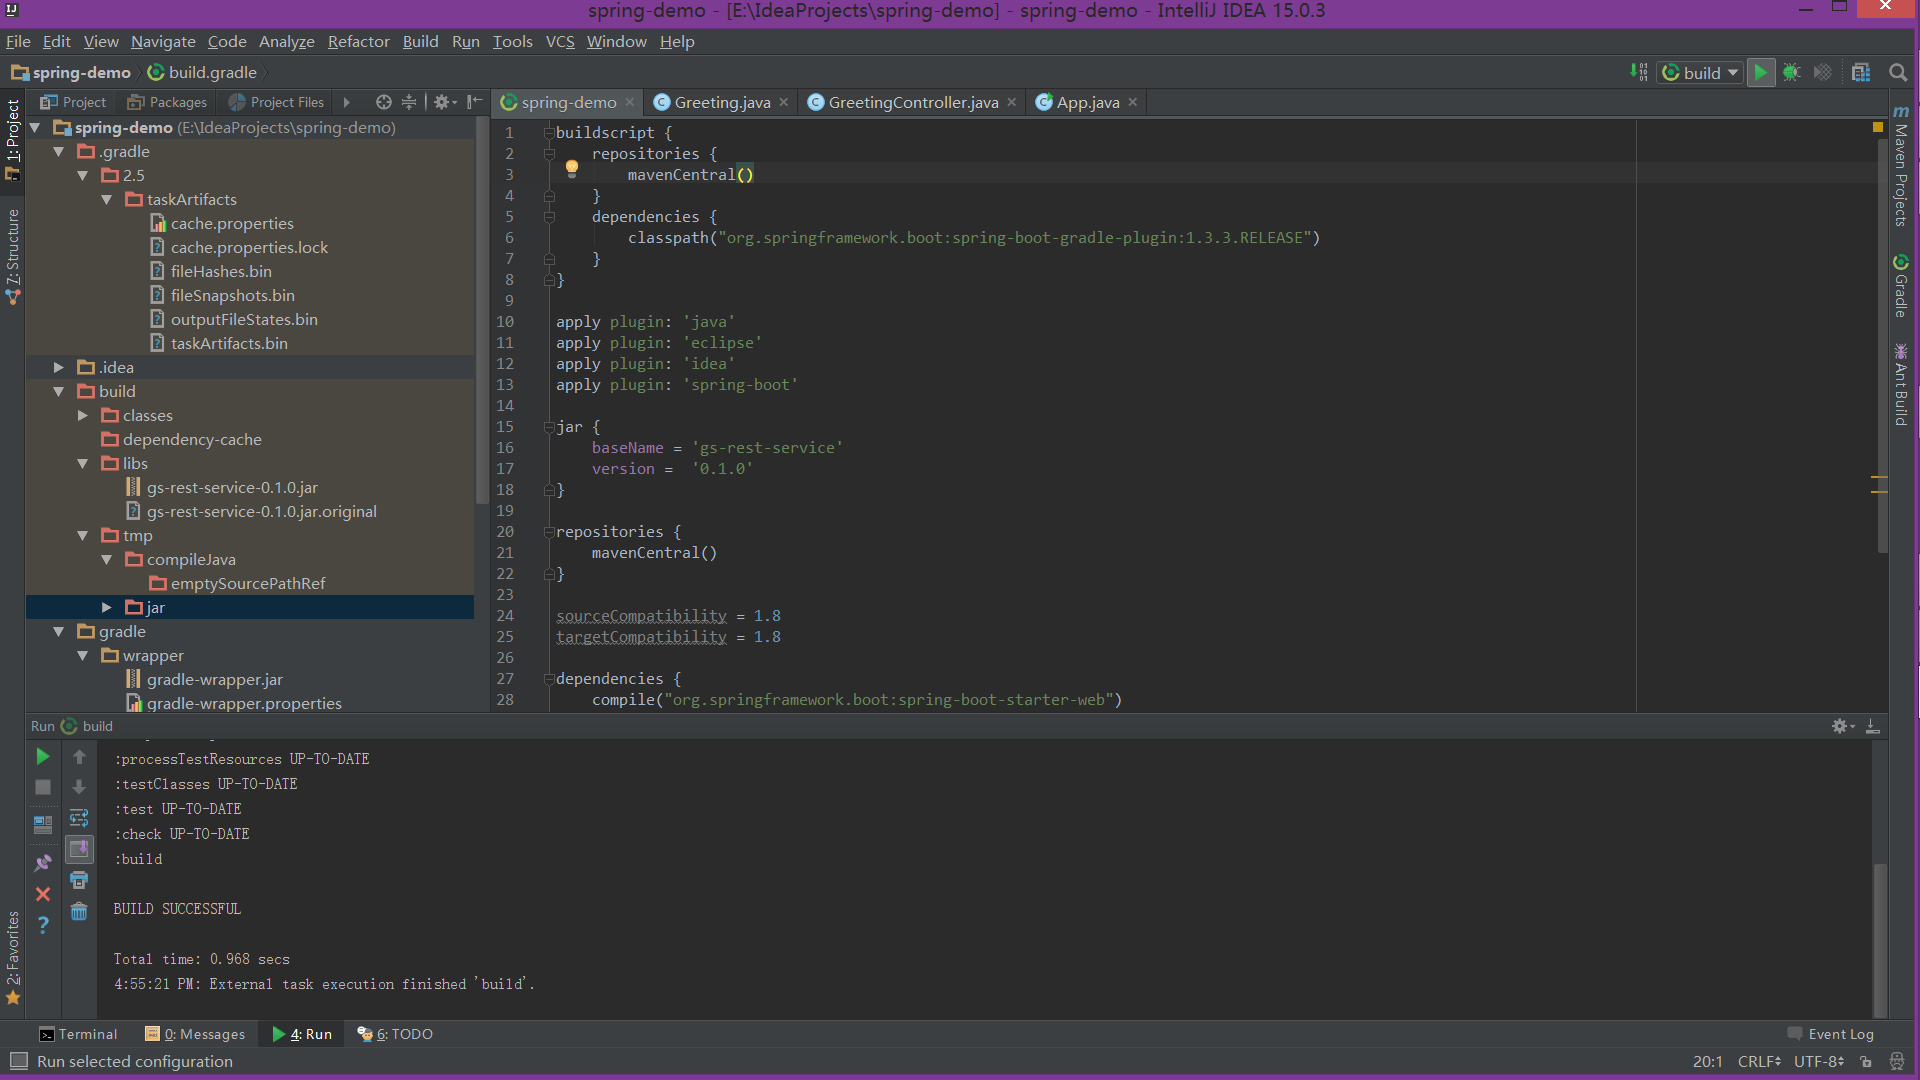
Run the Project
Once the project has been built, you could run it. Because this project is a stanlone web application, we just need running the JAR file.
Let’s configure now!
In fact, what you need to run is the following instruction.1
java -jar build/libs/gs-rest-service-0.1.0.jar
Open the Configruation again, and add JAR Application this time.
The name is run and Path to JAR is gs-rest-service-0.1.0.jar‘s location. VM options need to be specified, which is -jar.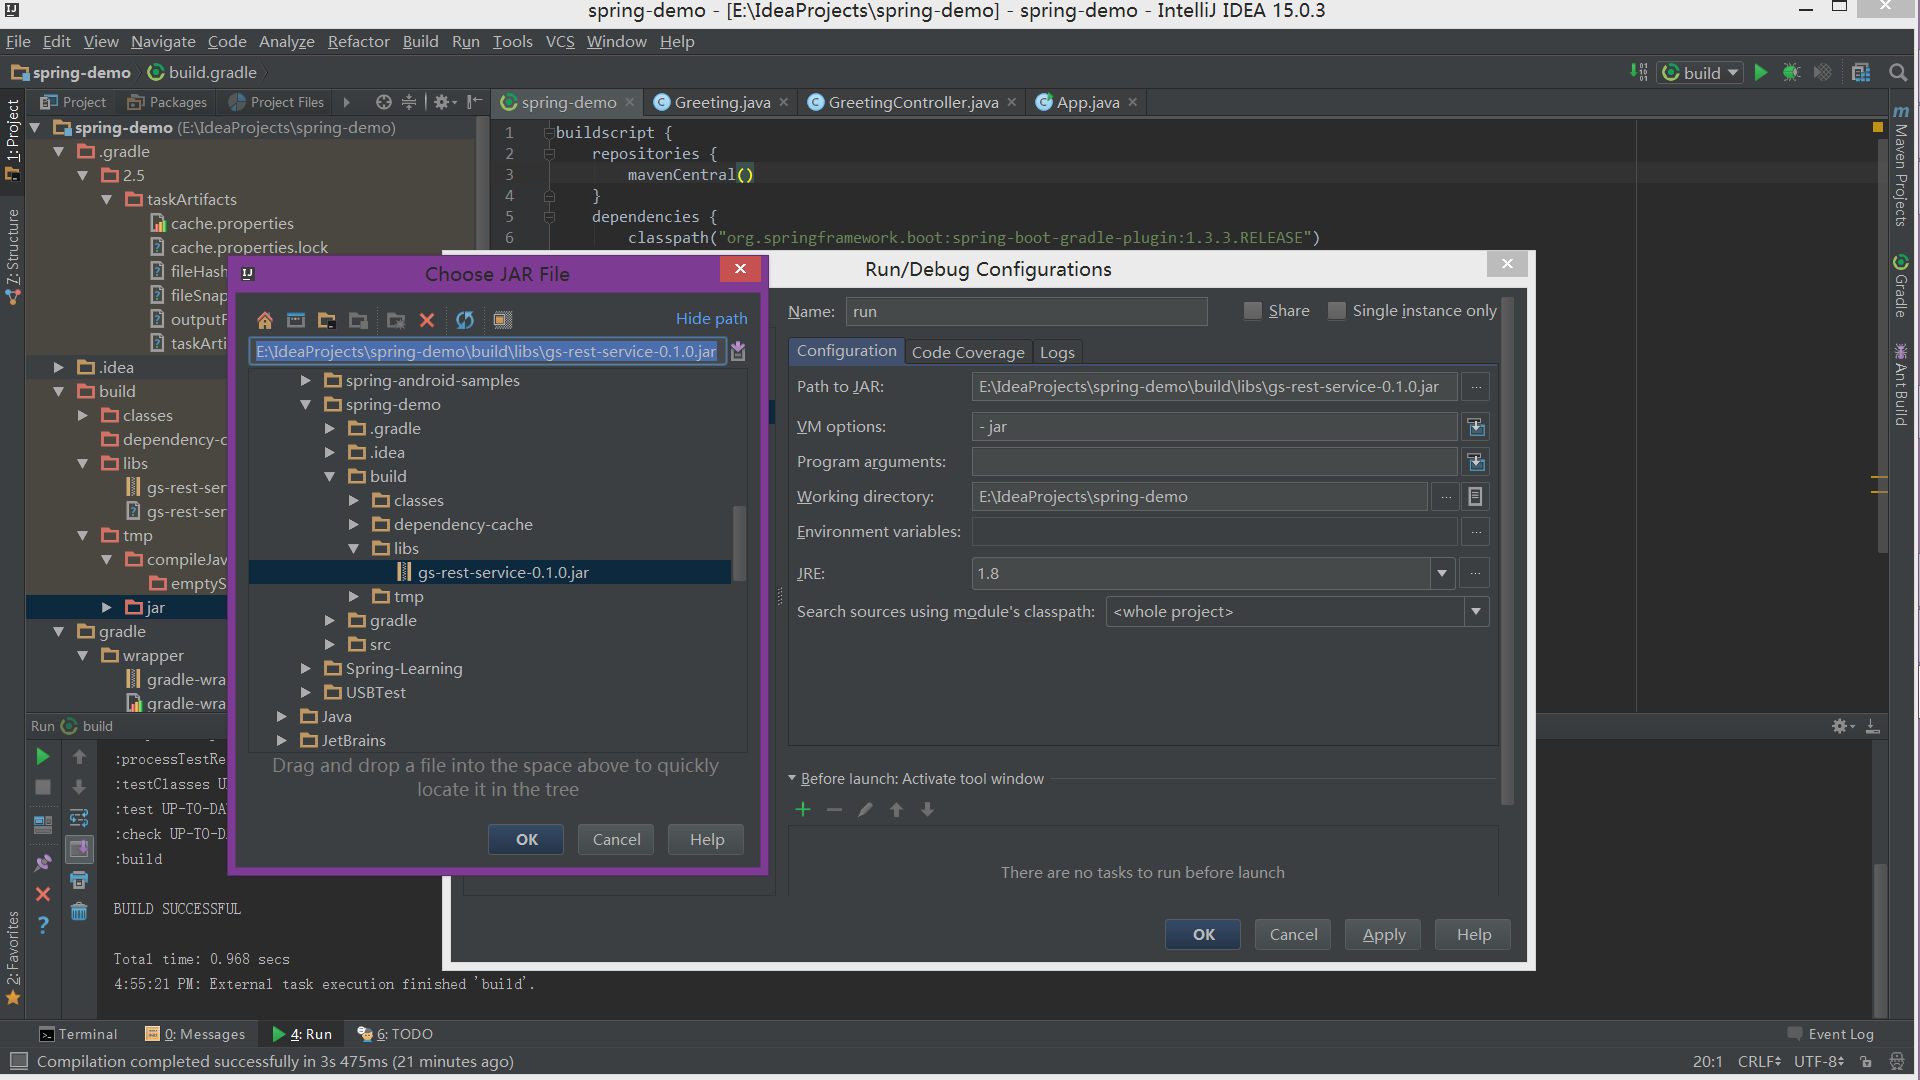
Run the project by click run button.
Test Web Service
Now that the service is up, visit http://localhost:8080/greeting, where you see:1
{"id":1,"content":"Hello, World!"}
Provide a name query string parameter with http://localhost:8080/greeting?name=User.
Notice how the value of the content attribute changes from “Hello, World!” to “Hello User!”:1
{"id":2,"content":"Hello, User!"}
Refernce
https://spring.io/guides/gs/rest-service